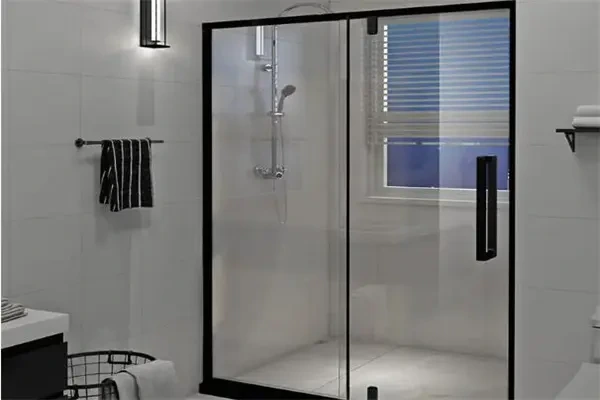
Shower enclosures are now commonplace in hotels and homes alike. After a busy day at work, a hot shower at home and a shout of “comfort” will instantly wash away all your tiredness. So, how do you installation of shower enclosures?
This article will give you details on how to install Shower Enclosures, shower screen, shower room.
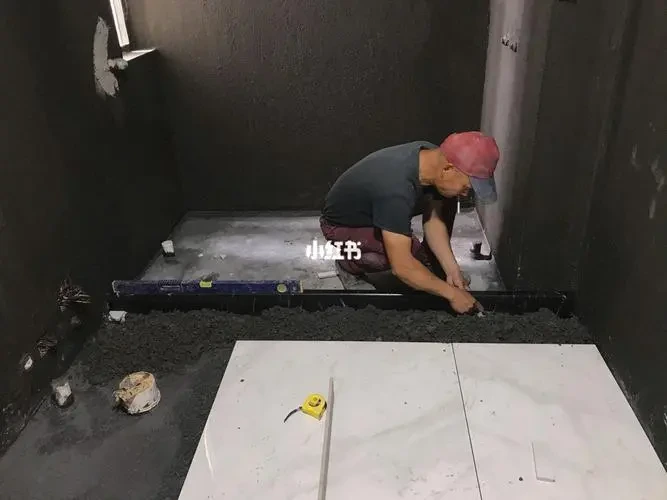
1.First make a good size, then install the foundation, use a black foundation, it is not easy to get dirty.
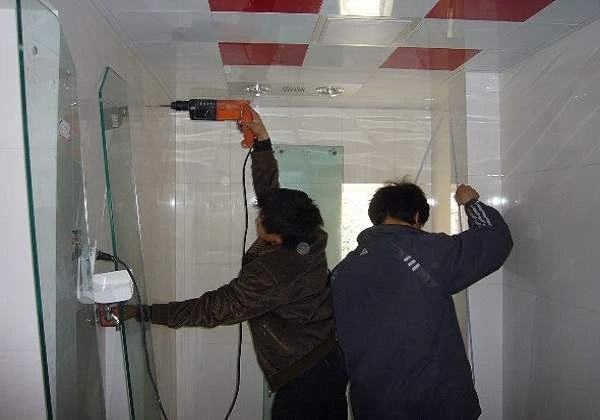
2.Drill holes in the wall to prepare the frame for fixing the Shower enclosures.
3.Then it is time to fix the screws.
4. After fixing the frame, install a 6 per cent tempered glass wall, using two U-shaped slots above and below each to clamp the glass, stuck in the aluminium frame on it.
5. Install the double curved shower door, which is installed in the aluminium frame slot with two two wheels each up and down, and a stopping bead on the left and right sides.
6. Attach a magnetic sleeve to the sides of both doors to keep them closed and to prevent them from banging.
7. Fit the handles to the Shower screen. The handles are designed with the appropriate screw holes and can be screwed on with a screwdriver.
8. The Shower screen is designed to prevent water from accumulating in the lower part of the aluminium frame, as opposed to the U-shaped Shower screen. It is a lazy design.
1.The wall of the rough room is not treated with waterproofing, before tiling, a layer of cement mortar should be plastered beforehand and then tiled, after tiling, the renovator should be asked to carry out water seepage prevention treatment on the brick joints, so that the water in the bathroom can be avoided to penetrate into the wall through the brick joints.
2. The size of the pre-buried holes should be designed before the bathroom decoration.
3. The wiring of the earth leakage protection switchgear, etc., should be considered before the installation of shower enclosures screen to avoid rework.
4. The style of Shower screen should be determined according to the layout of the bathroom.
5. Shower screen must be firmly connected to the building structure.
6. If the water supply system has been installed and tiled before the Shower screen is installed, it is best to have the Shower screen custom-made.
Before installing the shower room, we should first check that it is fully packed and that all the accessories are available. In addition, you should prepare all the parts and auxiliary tools needed for the installation of shower enclosures and place them once again so that they are easily accessible.
Determine the installation position of the Shower Encloures, adjust the foot screws, level the basin and connect it to the water pipe; then carry out a water test on the basin to check for leaks (if you wait until the installation is complete before carrying out a water test, once a leak is detected, maintenance will be more complicated). Fix the backsplash and shower screen to the back of the basin with stainless steel screws.

After the installation of the basin, a water test should be carried out to ensure that there is no obstruction to the water coming out of the bottom of the shower. It is also important to note that the bottom of the basin needs to be protected before the shower is installed to prevent any damage to the bottom of the basin that may affect the installation of shower enclosures and use of the shower.
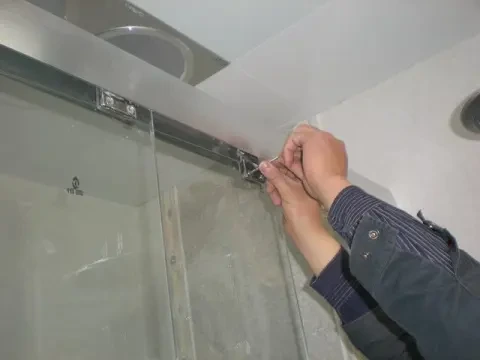
In order to avoid accidentally bursting the hidden pipes during the drilling, we must use a pencil and level to determine the drilling position of the aluminium against the wall before the installation, and then use an impact drill to make the holes. The overall safety of the Shower enclosures is significantly linked to the regularity of the Shower enclosures installation, so no detail should be overlooked. We must check that the holes are accurately drilled, that the fittings are properly installed and that the waterproof seal has been made.
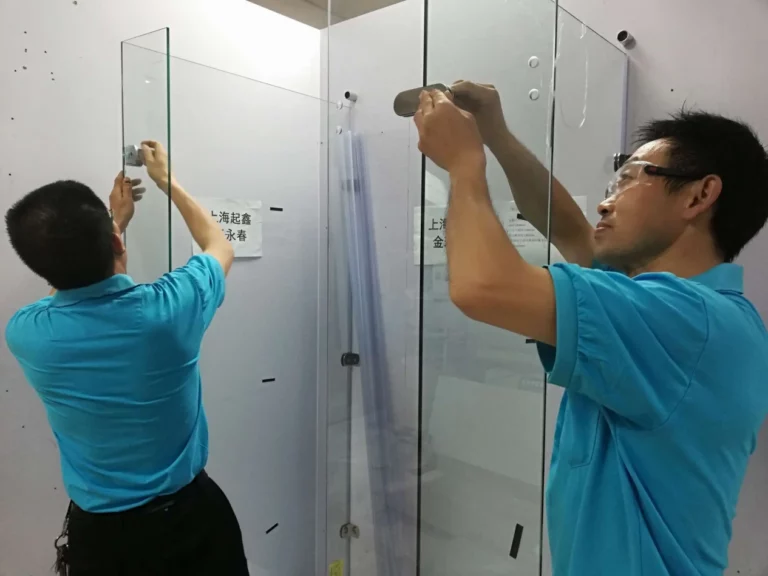
To fix the glass in the front side of the shower, insert the seal into the gap between the glass and the frame on both sides. When fixing the glass in the Shower enclosures, lock the glass tightly into the drilled holes in the basin. When the bottom of the flat or curved glass enters the glass clamping slot, slowly push in the wall-mounted aluminium and then use the screws to fix it.
After fixing the glass, find the appropriate position above the glass for drilling, then install the fixing block and connect the top tube and fix it to the top of the glass with a bent tube sleeve. After measuring the position, install the shelves, tighten the laminate nuts and fix the glass on the laminate, keeping it vertical and horizontal. Finally, install the hardware of the movable door, install the hinge at the reserved hole of the fixed door and then adjust the axial position of the hinge until the door feels comfortable to close.
The installation of the movable door is also a key step in the proper functioning of the shower. Place the hinges at the holes reserved for fixing the door and adjust the position of the hinge axis so that the shower door feels smooth and easy to open and close. Assemble the top cover and seal the edges with a special anti-mould glass glue for kitchens and bathrooms.
The hot and cold water connections should be made with a 90 degree copper elbow and a pair of wires, to avoid the poor water supply caused by bending the hose directly with a pair of wires. Try out the water supply and check for leaks.
Firstly, use silicone to connect the aluminium to the wall and the seam between the basin and the glass firmly, then check whether the parts are comfortable and smooth to use, and adjust them immediately if problems are found. Once adjusted, check again that the corresponding screws have been tightened so that the Shower enclosures are secure, and finally wipe the Shower enclosures with a rag.
Insert the downpipe into the downpipe and seal the perimeter of the downpipe with glass glue to complete the installation. It is necessary to put a water barrier on the side and lower part of the glass and then use silicone to close the gap between the aluminium and the wall, the glass and the basin to ensure that there is no water leakage.
If you have completed the above steps, please do not rush to use it, you need to carry out the final commissioning and completion of the work. This is a step that should not be overlooked. Commissioning and checking will ensure that the shower is used properly and that it is comfortable and smooth to use. Finally, the entire shower room is cleaned and installed.
To install a shower room you must first fix the frame of the shower room, draw the approximate position where it needs to be installed, then punch the holes, install the expansion rubber, tighten it and finally fix the frame with tools.

If the shower room consists of two sliding doors, the wall frame and bottom frame need to be installed first. After installing the tempered glass, the bottom needs to be fixed. If the two doors of the shower room are not fixed, please use the U-shape first, fix the fittings and then fix the nuts and screws to the bottom frame connection with pliers and screwdriver.
After installing the toughened glass of the shower room, next, install the top frame by first determining the exact location, then punching holes and dealing with the screws on the fixed parts on the top frame, then installing the fixed glass and sliding doors etc., rubber granules, joints are well treated and the top frame can be fixed with tools.
The previous steps have been dealt with, the next step is to install the sliding door and handle, the sliding door is installed by first installing the wheels, fixing the sliding door and finally installing the sliding door, the handle is very simple to install, firstly, the handle is aligned with the glass respectively, by tightening the fixing holes and finishing.
1. To ensure the smoothness of the Shower Encloures pulleys, lubricant or Peanut Oil can be added as appropriate.
2. When the pulleys of orbital Shower enclosures are in a loose or dislodged state, promptly find maintenance personnel to adjust to ensure the effective bearing of the pulleys on the movable door, and then use paper towels with peanut oil to clean the foreign matter inside the track to ensure smooth sliding; avoid hitting the movable door with force to avoid causing it to fall off.
3. Do not hit the glass with sharp and hard objects, especially the four corners of the four sides.
Installing a walk-in shower kit is a popular choice for many homeowners. Knowing how to install it correctly can ensure its longevity and functionality.
Walk-in shower kits are often preferred for their modern aesthetics and space-saving design. They offer easy access, making them ideal for all ages.
Ensure the floor is level. If not, level it using a suitable method. Then, position the drain and connect it to the plumbing.
Position the shower base in the desired location. Secure it according to the manufacturer's instructions. Remember to apply a bead of silicone around the edges for waterproofing.
Follow the manufacturer's instructions to install the wall panels. Most kits come with adhesive strips or clips for this purpose. Make sure all panels are securely in place.
Position the door frame, ensuring it's level. Secure it with screws. Install the door, making sure it opens and closes smoothly.
Use a high-quality silicone sealant to seal all edges and corners. This ensures water doesn't seep out.
Install shower fixtures, like the showerhead and taps. Many people also add shelves or baskets. Ensure these are securely mounted.
Clean it regularly with mild detergent. Avoid using abrasive cleaners which can damage the surface.
Installing a walk-in shower kit can be straightforward when following the manufacturer's guidelines. Proper installation ensures the shower's durability and function. Always consider hiring professionals if unsure.
When considering installing a shower cubicle, understanding the costs involved is crucial. Various factors influence these expenses.
Larger, more intricate designs typically cost more. Custom-made enclosures might also have a higher price tag.
Higher-end materials, like tempered glass or stone resin trays, can increase costs. Conversely, acrylic or fiberglass might be more affordable.
Installation fees can vary depending on your location and the complexity of the installation.
Features like anti-slip trays or thermostatic showers can increase the price.
Established brands may command higher prices due to perceived quality and warranty offerings.
Replacing an existing enclosure can sometimes be cheaper than a brand-new installation, as some elements might be reusable.
If you need to reroute plumbing or make significant changes, this can elevate the cost.
In some areas, permits are required, adding to the overall price.
Rush installations might come with premium charges.
Longer warranties or additional maintenance packages can add to the initial cost but provide peace of mind.
By understanding the factors that influence the cost, you can budget effectively for your shower cubicle installation.
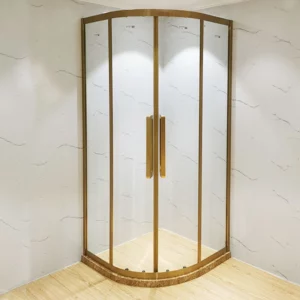
A quadrant shower enclosure is an excellent space-saving option. It's essential to follow the instructions carefully to ensure a watertight finish.
This is a type of enclosure designed for corner installations. Its curved front makes efficient use of space.
Position the tray in the corner. Secure it according to the manufacturer’s guidelines. Connect the drain.
Slide the glass panels into the frames. Most quadrant enclosures have sliding doors. Ensure they move smoothly.
Using a silicone sealant, seal all edges. This step is vital for preventing leaks.
Install the showerhead, taps, and any other fixtures you desire. Ensure they're securely fastened.
Regularly clean your quadrant enclosure with mild detergent. Check seals periodically for wear.
If you're unsure about any installation steps, consider hiring an expert. They can ensure the job is done right, saving future headaches.
Finding trusted professionals for your shower enclosure installation can ensure longevity and functionality. Here's how to locate them.
Ask friends, family, or neighbors about their experiences. Personal recommendations can be invaluable.
Sites like Yelp or Angie's List offer reviews and ratings. Check feedback and select top-rated professionals.
Many industry associations list reputable professionals. This can be a reliable source.
Many showrooms have partnerships with installers. They can recommend trusted teams.
Always get multiple quotes. Compare prices, but also consider experience and reviews.
Ensure the installer has relevant qualifications and insurance. This provides added peace of mind.
Ask for examples of previous installations. It'll give you an idea of their expertise.
Always have a written contract. Ensure it includes a warranty for the work.
The right professional will answer your questions and address concerns. Open dialogue is essential.
Ask if they provide aftercare or maintenance services. It can be beneficial in the long run.
Prefabricated shower enclosures, often termed as "prefab", are units manufactured off-site and delivered ready for installation. They contrast with traditional tiled showers that are built on-site.
These units often consist of a shower base, walls, and doors. They come in various sizes and designs, catering to different preferences.
One of the standout benefits of prefab enclosures is the swift installation. Since they're produced in factories, on-site work is significantly reduced.
Prefab showers tend to be more budget-friendly than their tiled counterparts, making them an attractive option for many homeowners.
With fewer grout lines than tiled showers, cleaning and maintenance are straightforward. It can save time and effort in the long run.
Factory-made ensures consistent quality. Each unit undergoes standardized checks before dispatch.
Modern prefab enclosures come in a range of styles and finishes. Whether you prefer a minimalistic look or a more luxurious design, there's something for everyone.
Prefabricated units are specifically designed to prevent leaks. Their seamless design and built-in water barriers make them highly efficient.
Many prefab showers are made from recyclable materials, making them an eco-friendly choice.
While they come pre-made, many manufacturers offer customization options, allowing you to add your personal touch.
Always ensure you're purchasing from a reputable manufacturer. Check reviews, warranty offerings, and after-sales service.
Installing a basic shower kit can be a straightforward DIY project if you're handy. Here's a concise guide.
Ensure you have all necessary tools. Read the manufacturer's instructions thoroughly.
Clean and level the installation area. Remove any old fixtures and ensure plumbing is ready.
Place the shower base in the desired spot. Secure it as directed, typically with screws. Ensure it's level.
Attach the wall panels. Most kits use clips or adhesive strips. Ensure edges align perfectly.
If your kit includes a door, install it now. Ensure smooth movement and check seals.
Apply silicone sealant around all edges, corners, and where walls meet the base. This prevents water leaks.
Mount the showerhead, taps, and any additional accessories. Ensure firm installation.
Turn on the water to check for any leaks. Address any issues immediately.
Clean regularly using non-abrasive cleaners. Check seals occasionally for wear.
If you're unsure at any step, consider hiring a professional. They can guarantee a perfect installation.
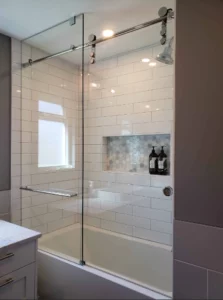
A framed glass shower enclosure offers a sleek look and durability. Proper installation is essential for its functionality.
These enclosures use metal frames to support the glass, offering strength and structural integrity.
Typically, you'd need a drill, level, silicone sealant, screws, and other manufacturer-specified tools.
Before installing, measure and mark where the frame will be fixed. Precision is crucial.
Ensure the base is level. Once in place, secure it as instructed.
Follow the manufacturer's guide to assemble the frame. Attach it to the walls, ensuring it's perfectly vertical.
Carefully slide the glass panels into the frame. If it's a door, check its movement.
Apply silicone sealant where the frame meets the wall and base. This step is vital for a watertight seal.
Install any fixtures, such as handles or towel racks.
Regular cleaning will keep your framed glass enclosure looking new. Use glass cleaners for best results.
For large or intricate installations, consider hiring an expert. They ensure a flawless finish and long-lasting setup.

The African commercial shower market presents unprecedented growth opportunities. Our Shower Enclosure Distributor Network connects
Introduction The African shower enclosure market continues to expand rapidly in 2025. Commercial construction growth
The African commercial shower enclosure market presents remarkable opportunities for manufacturers and distributors. Our comprehensive